InDesign Basics: Importing Text from a Word Document
In this Bitesize tutorial, you will learn how to import text from a word-processing document into your InDesign document. There are several methods for importing and managing large chunks of text, and we’ll take a look at the pros and cons for each technique.
-
Learn how to Place text into your InDesign document
-
Learn how to preserve the format of your source text
Option A: The Simple Methods for Inserting Text
There are three principle methods to insert text into your InDesign document, each of which have their advantages and drawbacks. (For help setting up an InDesign document, read this quick tutorial first.)
For each method, you should first prepare a text frame, or series of text frames for the text to be entered into, using the Type Tool (T). You can prepare a series of text frames, and thread them together before you insert any text.
The simplest two methods for inserting text are:
- To type text directly into the document (which can be manageable for short headings, titles and captions, but is a time-consuming method).
- To copy text from your source document and Edit > Paste the text into your InDesign document (which will not carry over any text formatting that may have been applied to the source document).
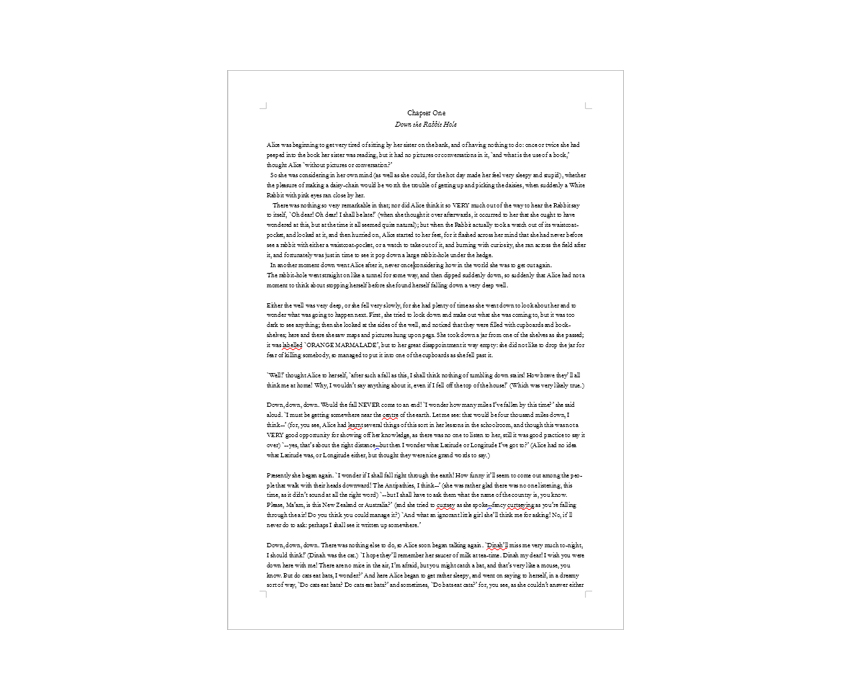
This shows an original source file created in Microsoft Word, and is the opening chapter of the classic novel, Alice in Wonderland. Some text formatting, such as font choice, font size, first-line indents and text alignment have been applied to the document.

If we simply copy and paste the content from the Pages document into our InDesign document, the formatting will be lost, only the paragraph structure of the chapter will be maintained. The text will adapt to the default style that has been applied to the InDesign text frame.

This method potentially gives you more control over the formatting of the text, but you have to define Styles etc in InDesign, and this can be time-consuming.
Option B: Import Text from a Word-Processing Application
A third option for inserting large quantities of text is:
- to import the text from an existing source file, like a Word or Pages document, by using the Place function (this can maintain the formatting of the original document).
This is the preferred method used by InDesign professionals when dealing with long documents, such as books, reports or catalogues.
Before you place the source file, you should be sure to clean the file of any potential ‘junk’ that might disrupt the import of the text. In your word-processing software, you should choose to Accept All Changes if the document has a number of tracked changes or notes.
In InDesign, ensure you have a text frame, or a series of threaded text frames, prepared on your document.

Then click away from the frames, onto the pasteboard. Go to File > Place.
Navigate to your source file and check Show Import Options at the bottom of the window. Click Open. The Import Options window will appear, allowing you to select which parts of the text you want to import. You can choose whether to import contents, index, footnotes and endnotes, and you can also tell InDesign how to manage formatting.
You can check the box next to Remove Styles and Formatting from Text and Tables to just import the text without any of the formatting applied to it in the source file. This can be a good way of managing the text, as it gives you more direct control over the formatting of the text going forward in InDesign.
The second option is to keep Preserve Styles and Formatting from Text and Tables checked to keep your existing formatting.

Click OK.
Your cursor will load with a symbol showing the first few lines of the text. Hover over the first text frame and click once. The text will flow into the frame and into any other text frames the first frame is threaded to.
You may get a warning window flashing up detailing any compatibility issues. A common issue , for example, might be a missing font. You can choose to Find Font, and pick a replacement, or just click OK. All text set in a missing font will be highlighted in the Normal Screen Mode.

A final option for placing text from a source file is to check Customize Style Import, at the bottom of the Import Options window. This option is only viable if you are sure that styles have been set up correctly in the source file.

Click on Style Mapping to the right of the check box. This function allows you to assign pre-existing InDesign styles to match the styles in your source file.

Once you have assigned styles, click OK. Then click OK again in the Import Options window.
Click once in the first text frame. Your text flows into the document, formatted according to your instructions.

Explore more beginner-level InDesign tutorials here.

